Let’s start with a little background of what Tailscale is. According to their website, “Tailscale is a VPN service that makes the devices and applications you own accessible anywhere in the world, securely and effortlessly. It enables encrypted point-to-point connections using the open source WireGuard protocol, which means only devices on your private network can communicate with each other.” This is a wonderful thing, being able to access any of your devices on the Tailscale VPN (Virtual Private Network) from other devices on your Tailscale network (tailnet). What is even better is that it is efficient about the transfer, as it will make a direct connection when it can. If two devices are on the same LAN and on the tailnet, any communication for those devices over that tailnet will only be sent over the LAN and not the Internet —as soon as a direct connection can be established. Although, it might use a DERP (Designated Encrypted Relay for Packets) server until that direct connection can be established, but fear not, the data is still encrypted.
Now let’s talk about what Caddy is. Their tag line is “The Ultimate Server: makes your sites more secure, more reliable, and more scalable than any other solution.” It is a web server written in the Go language. There are a few ways of configuring it, but I will be sticking with a configuration file called Caddyfile for what we will be doing.
What will we be doing with it? Setting up a web server on a tailnet so we can host any files, websites or even reverse proxy to and from inside the tailnet and LAN.
Why would you want to do this? Ever wanted to access your media while you are somewhere else other than home, listen to audio-books or podcasts without storing them on your phone, backup your data from a desktop or phone to your own personal server without the fear of someone spying on that transfer or accessing that data on a server in the cloud? Now you can do any or all these things.
How to setup a caddy web server on tailscale VPN
The easy way
The way I would suggest accomplishing this task is to use a docker image that I have built myself and have put up on docker hub. The only requirement is to have a system that can run docker containers. Although nothing is stopping anyone from using these steps on bare-metal machines, such as NixOS or any OS that can install tailscale and caddy.
The code can be viewed at https://github.com/TeamLinux01/tailscale-caddy-dns and the image is at https://hub.docker.com/r/teamlinux01/tailscale-caddy-dns. Feel free to open any issues, discussions or Pull Requests on the Github repo if you want to contribute.
Sign up for Tailscale account, if you have a Github account, you can authenticate with that and just log in with the free tier.
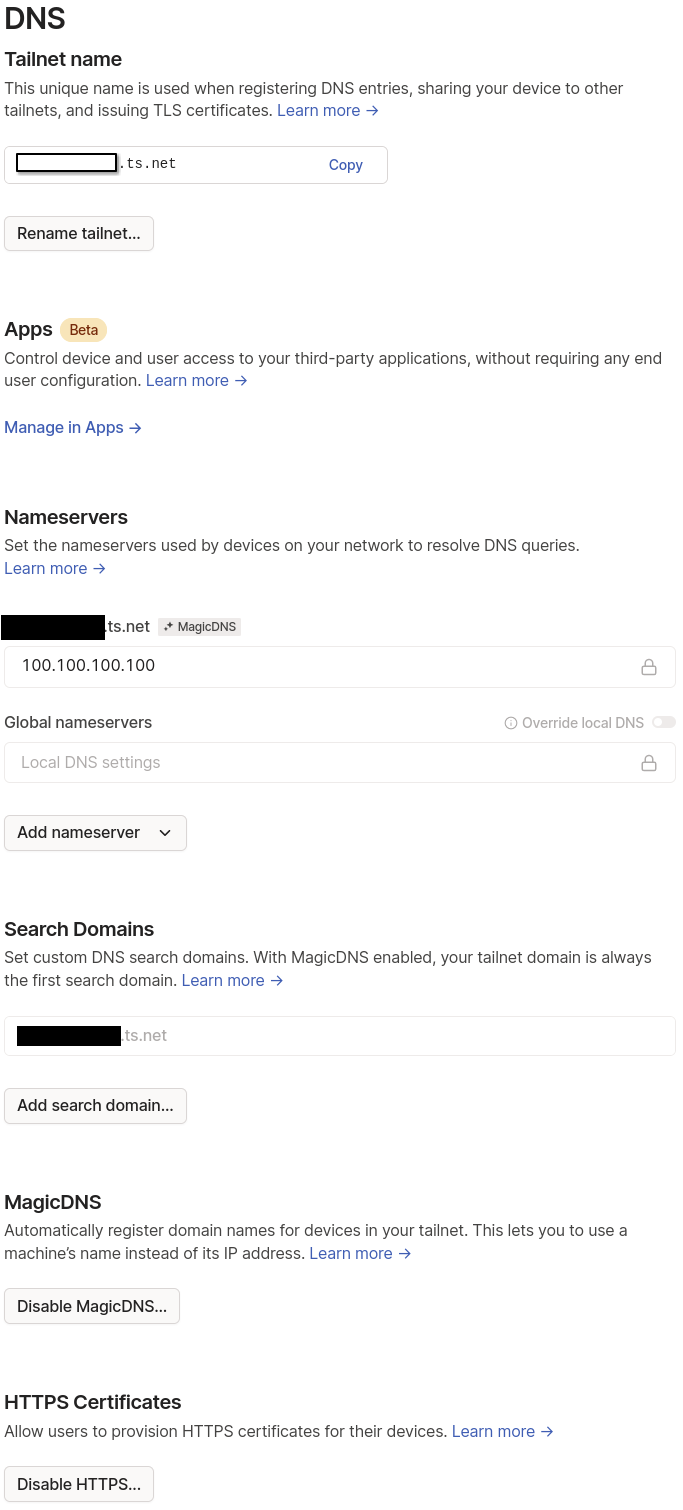
Start with locking in your tailnet name, turn on MagicDNS and HTTP Certificates by going to DNS settings. Pick something you can remember when it comes to tailnet names, it makes it easier; just re-roll a couple of times if you don’t like the first choices.
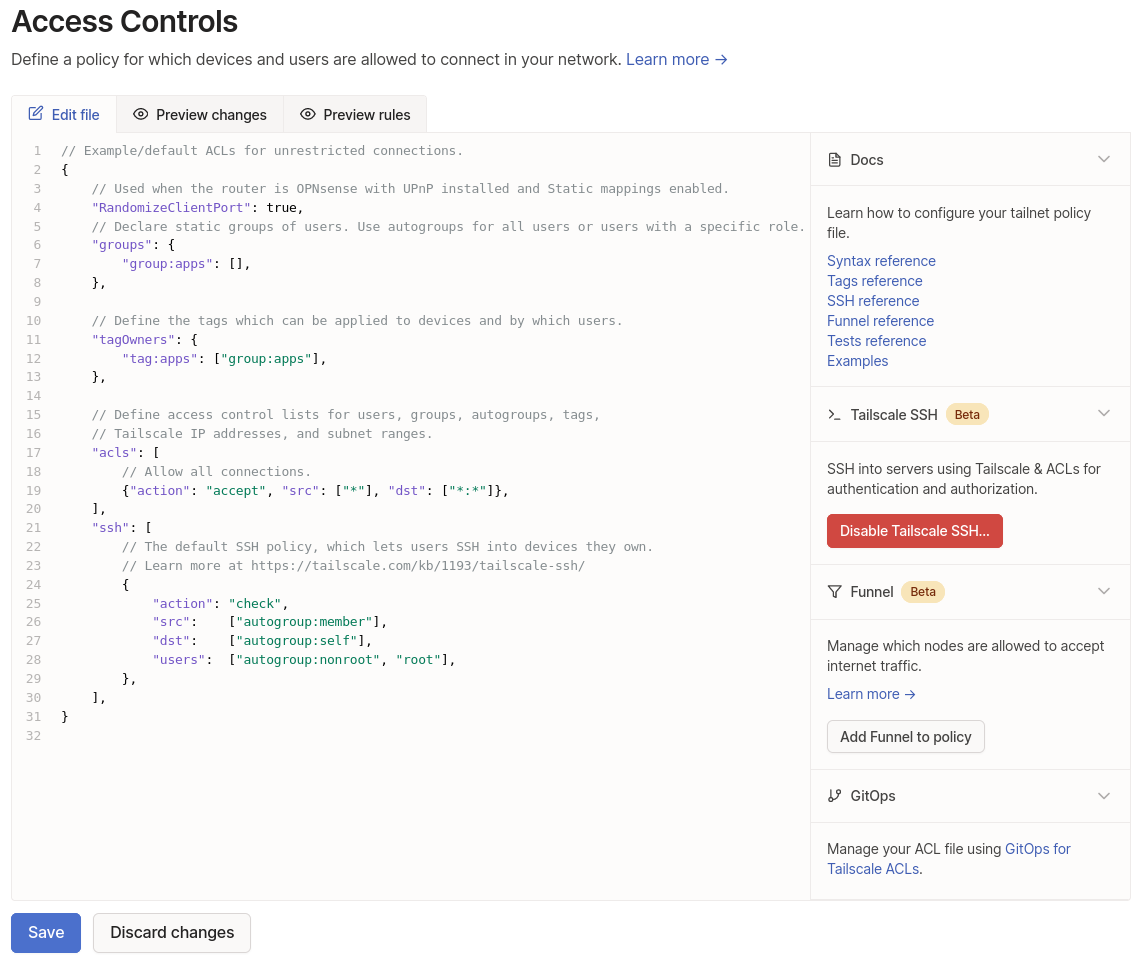
Next is setting up a tag so the machines don’t expire when it uses the specified key, go to configure Access Controls. This is the only required bit, my configuration also includes groups.
{
...
	// Define the tags which can be applied to devices and by which users.
	"tagOwners": {
		"tag:apps": [],
	},
...
}
Generate the keys to add machines to your tailnet, we will make a reusable key named “web-server” for any container we want to add.
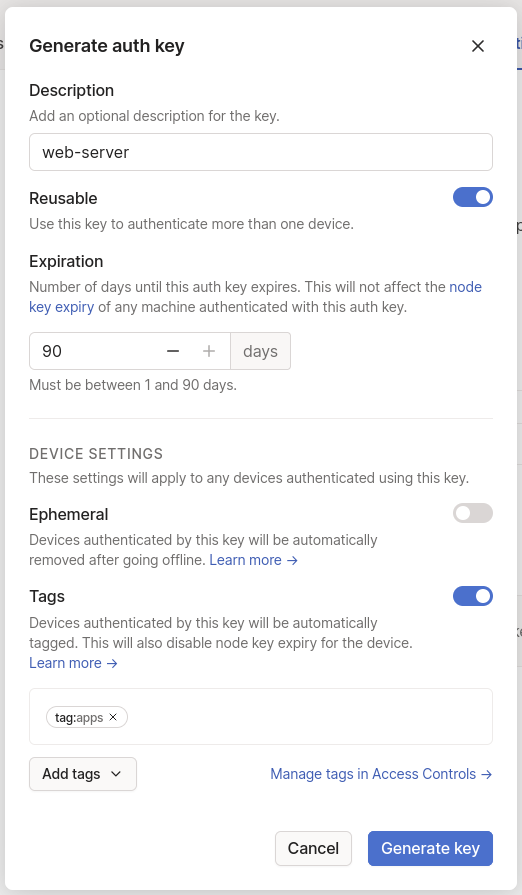
Copy and store the key in a password manager or other secure location. You may want to reference more than once. If you do want to be more secure, don’t make it reusable; just make sure that the container volume doesn’t get deleted. It is easy to revoke auth keys if you need to, same with machine keys.
Now that tailscale is setup, time to move on to docker.
Let’s assume you have a Linux desktop or server and want to spin up this container. Go ahead and install Docker. After that is done, run docker run hello-world in a terminal to test to see if docker is working properly; it might require sudo if you don’t add your user to the docker group.
Here is a docker cheat-sheet if you need it. Same with docker compose.
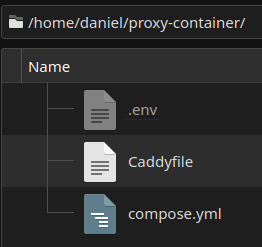
Create the few files needed before setting up the container. I will be using ~/proxy-container/, so we will have ~/proxy-container/Caddyfile, ~/proxy-container/compose.yml and ~/proxy-container/.env. Replace DOMAIN-ALIAS with your tailnet name and tskey-auth-exampleCNTRL-random with the auth key that was generated.
⚠️ The Caddyfile uses tabs for each indent and while it can run without proper indentations, it isn’t happy about it.
Caddyfile file contents:
proxy.DOMAIN-ALIAS.ts.net {
  tls {
    get_certificate tailscale
  }

  respond "This is a test site on tailnet"
}
:80 {
  respond "This is a test site on the LAN"
}
.env file contents:
TS_AUTH_KEY=tskey-auth-exampleCNTRL-random
🛑 The yaml file only wants double spaces for its indents, they are very important.
compose.yml file contents:
version: "3.8"

networks:
  proxy-network:
    name: proxy-network

services:
  proxy:
    image: teamlinux01/tailscale-caddy-dns:latest
    container_name: caddy
    environment:
      - TS_HOSTNAME=proxy
      - TS_AUTH_KEY=${TS_AUTH_KEY}
    networks:
      - proxy-network
    cap_add:
      - net_admin
      - sys_module
    ports:
      - "80:80"
      - "443:443"
      - "443:443/udp"
    volumes:
      - ./Caddyfile:/etc/caddy/Caddyfile:ro
      - proxy_data:/data
      - proxy_config:/config
      - /dev/net/tun:/dev/net/tun
    restart: unless-stopped

volumes:
  proxy_data:
  proxy_config:
From the terminal go to ~/proxy-container and run docker compose up -d.
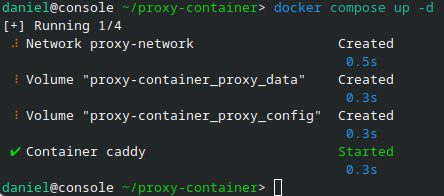
The machine should show up on the tailnet, you can check the machines IPs and settings.

⚠️ Don’t forget to change the DOMAIN-ALIAS text in Caddyfile, like I did. If you did, you can change the text now and caddy will automatically reload without having to do any container commands.
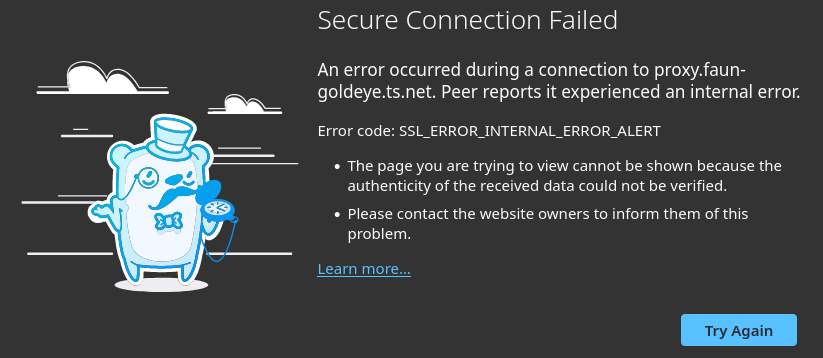
After entering the correct address and reloading the page, it will take several seconds to load, as it has to get the TLS certificate from Let’s Encrypt.

You can check the logs of the container with docker logs caddy command.

⚠️ I load the website from
http://localhost, which is accessing the site from the loopback network on the host same as using the IP address of127.0.0.1. While the site in this demo will come back with the textThis is a test site on the LAN, it isn’t technically using the LAN. It was just easier to demo as the name is readily available, where as a name likedemo.localwould require registering that name in the local DNS server to resolve.
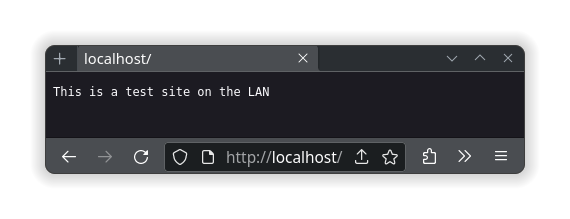
Run docker compose down in the ~/proxy-container/ directory from the terminal to stop the container.
📝 Remember that the configurations for both caddy and tailscale are stored in volumes, so as long as those volumes don’t get deleted, it will just pick up where you left off when the container is created again.
If you want to use self-signed TLS certs, caddy can do that too. You have to make sure that WEBSITE-NAME is the name that will be resolved by DNS, such as server.local. If the name doesn’t match, either DNS won’t know which computer to point to, caddy won’t know what site to give you or you will have the SSL_ERROR_INTERAL_ERROR_ALERT displayed.
Caddyfile file contents:
WEBSITE-NAME {
  tls internal

  respond "This is a TLS encrypted site"
}
This is where the real fun begins
Reverse Proxying
Caddy has the ability to reverse proxy, which allows a web server to get information from another web server and act like it is the original server to the client. As long as the container can access the other server by DNS or IP address, it can serve it up as its own. The caddy syntax looks like this:
proxy.DOMAIN-ALIAS.ts.net {
	tls {
		get_certificate tailscale
	}

	reverse_proxy https://daniel.melzaks.com {
		header_up Host daniel.melzaks.com
	}
}
HOST's-HOSTNAME {
	tls internal

	reverse_proxy https://daniel.melzaks.com {
		header_up Host daniel.melzaks.com
	}
}
🛑 Don’t forget to check firewall settings on the host. If ports for http (80) and https (443) are blocked on the host, it doesn’t matter if the container is serving them, they won’t get through over the LAN.
If you have other docker containers on the same docker network, you can reverse proxy using the docker’s internal DNS names and ports.
If you only want services on the tailnet and not the LAN, you don’t have to publish any ports to the host. Just use MagicDNS names for the site and let tailscale do the rest.
🛡️ Caddy has a Request Matchers function that is useful for blocking IP addresses from accessing site blocks. Add
remote_ip private_rangesright after thetlsstatement to block access from the Internet (includes tailnet) or add any tailnet IP after theremote_ipusing spaces to allow individual tailnet machines to access the site. If you using@siteandhandlesite blocks, put theremote_ipin the@sitepart above thehoststatement.
Push it to the limits
Understanding and working around DNS limitations
One thing to understand is how caddy serves sites requests. It does this by matching the incoming request by the DNS name being used in the header host name of the traffic, although I am not 100% sure that is exactly what it using. Let me know if that is wrong and I will update this section.
What I do know is that if you put a site block of proxy in the Caddyfile, you can go to that site with tailscale’s short host name of MagicDNS. An example would be to have this in your Caddyfile:
proxy {
    tls internal

    respond "This is a shorthand tailnet name"
}
While the container is up and running with the tailnet hostname of proxy, it will serve whatever it is told in that site block of code. This example has it generate a self-signed TLS certificate and respond with the text “This is a shorthand tailnet name.”
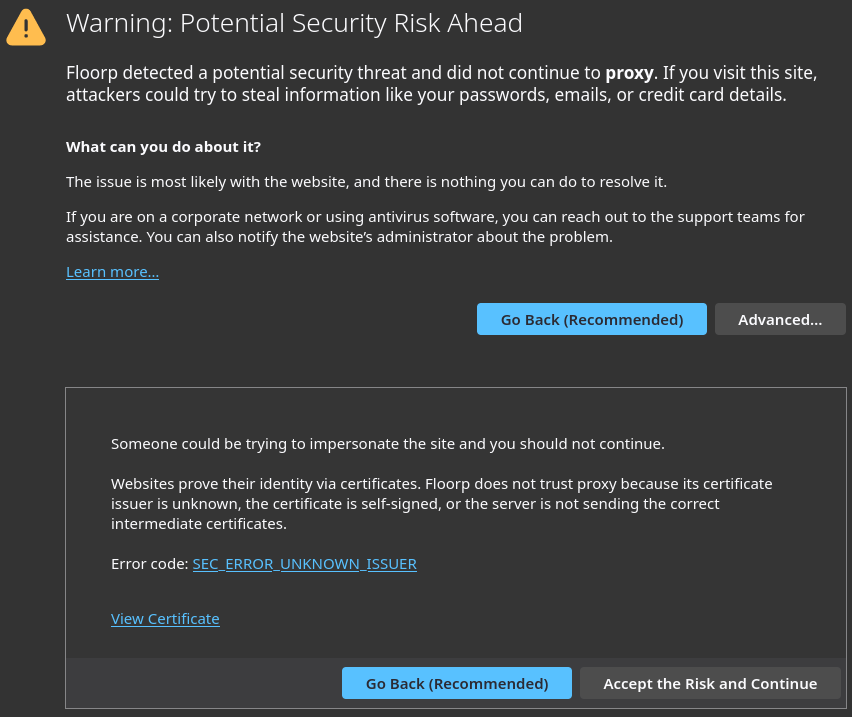
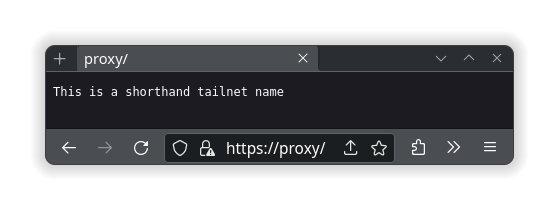
There is no easy way to get a proper TLS cert for this shorthand name of the domain, as it is not a FQDN (Fully Qualified Domain Name), so no upstream certificate issuer would generate one. A workaround to not get this warning would be to add the caddy’s internal certificate issuer as a trusted issuer on each machine you want to visit from, but that is out of the scope I want to talk about.
The other limitation I want to bring up is with MagicDNS. It does not support subdomains at the moment, so only the shorthand name and the FQDN of the host will resolve using it. An example of this would be that proxy and proxy.DOMAIN-ALIAS.ts.net will work and could serve the same site using two different caddy site blocks or two different site, but you can’t use nextcloud.proxy or nextcloud.proxy.DOMAIN-ALIAS.ts.net as they would not resolve to DNS entries. At least not automatically.
For TLS to work properly, it needs to use DNS names and not IP addresses; also, each machine only gets one FQDN to match against for MagicDNS and https certs to be used on a tailnet. If tailscale does add subdomains, wildcard matching for both TLS certs and caddy’s site blocks could be used; unless tailscale sets it up where you have to provide individual subdomain names, at which point things get a little more complicated.
For those that want little fuss with MagicDNS, you should choose to have a dedicated reverse proxy container for each service you want to run. Then use the name you want to call that service in the TS_HOSTNAME in the compose.yml file for the image: tailscale-caddy-dns:latest service. There will be more machines being used on your tailnet to do so, but it is easier to configure and it is all self contained in a single compose.yml, such as this example:
compose.yml file contents:
version: "3.8"

networks:
  speedtest:
    name: speedtest

services:
  proxy:
    image: teamlinux01/tailscale-caddy-dns:latest
    container_name: caddy
    environment:
      - TS_HOSTNAME=speedtest
      - TS_AUTH_KEY=${TS_AUTH_KEY}
    networks:
      - speedtest
    cap_add:
      - net_admin
      - sys_module
    ports:
      - "80:80"
      - "443:443"
      - "443:443/udp"
    volumes:
      - ./Caddyfile:/etc/caddy/Caddyfile:ro
      - proxy_data:/data
      - proxy_config:/config
      - /dev/net/tun:/dev/net/tun
    restart: unless-stopped

  librespeed:
    image: lscr.io/linuxserver/librespeed:latest
    container_name: librespeed
    environment:
      - PUID=1000
      - PGID=1000
      - TZ=Etc/UTC
      - PASSWORD=PASSWORD
    networks:
      - speedtest
    volumes:
      - librespeed_config:/config
    restart: unless-stopped

volumes:
  proxy_data:
  proxy_config:
  librespeed_config:
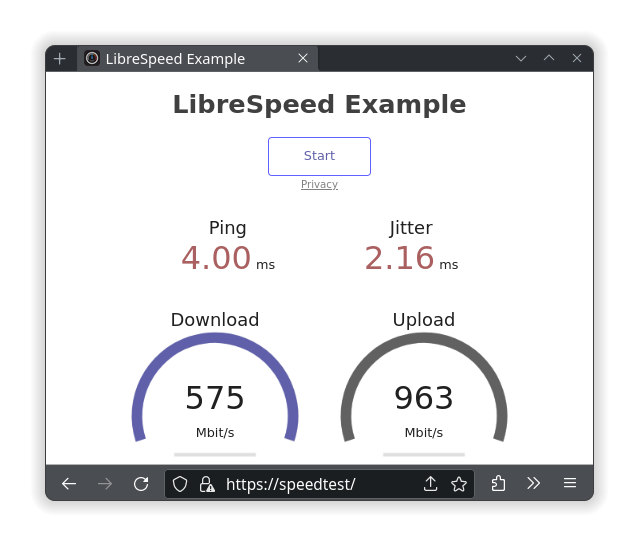
Start up a container and be able to access it at https://speedtest
Caddyfile file contents:
speedtest {
tls internal
reverse_proxy http://librespeed
}
There is one other way of getting around the MagicDNS limitation. If you control a public domain name, you can set some DNS entries to point to your reverse proxy tailnet machine’s IP addresses. I personally just set the wildcard entry of my domain to point to my tailnet IP addresses, that way I can handle any new services just by changing the Caddyfile and nothing else. While you are at it, you can configure caddy to request TLS certs using the DNS as a Let’s Encrypt responder, so you can have fully supported TLS certs for your custom DNS services. I personally use Cloudflare DNS and this code
CLOUDFLARE_AUTH_TOKEN=example
in my .env along with the code
environment:
  # Optional: Used for Cloudflare DNS to get Let's Encrypt TLS certificate.
  - CLOUDFLARE_AUTH_TOKEN=${CLOUDFLARE_AUTH_TOKEN}
in part of my compose.yml to get these TLS certs automatically. I will go over that in another part.
If you have access to DNS overrides, such as with OPNsense, you can specify those entries to go to either the LAN IP address or the tailnet IP address and it should work with the proper caddy site block settings. Although TLS will have to be internal, unless it matches a FQDN for a cert you could get publicly, such as a Cloudflare DNS entry.
The other important thing to know about is caddy’s ability to listen to other ports automatically. With this knowledge, you can host all sorts of different services at the same domain name, just accessed via a different port number. Here is an example of a Caddyfile that hosts a website on port 443, another website on 8443 and a reverse proxy of the librespeed container on port 9999:
Caddyfile file contents:
proxy {
  tls internal

  respond "This is service1 on port 443 over tailnet shortname proxy"
}
proxy:8443 {
  tls internal

  respond "This is service2 on port 8443 over tailnet shortname proxy"
}
proxy:9999 {
  tls internal

  reverse_proxy http://librespeed
}
More than one service from the same MagicDNS shortname
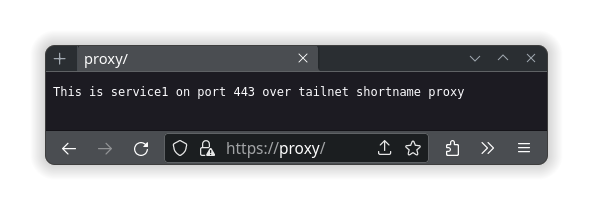
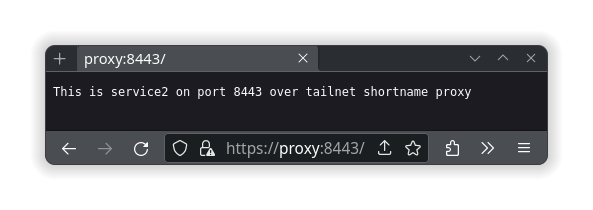
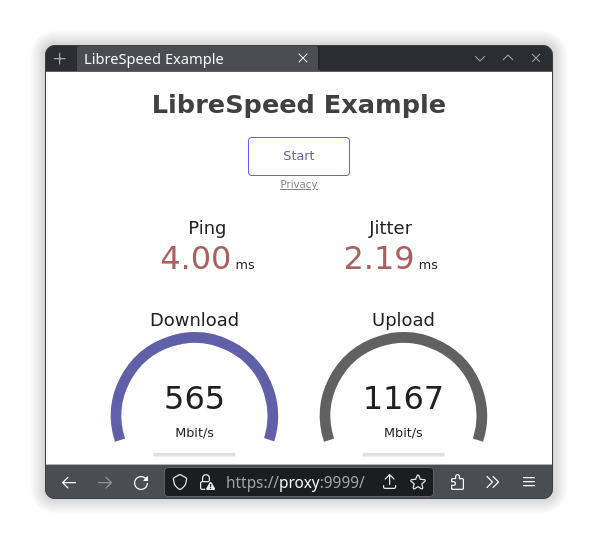
Remember, caddy will only match to what is provided, so if you want to also resolve with https://proxy.DOMAIN-ALIAS.ts.net, https://proxy.DOMAIN-ALIAS.ts.net:8443 and https://proxy.DOMAIN-ALIAS.ts.net:9999, then more site blocks would be required; along with the proper TLS setting for tailscale. The same goes with hosting on the LAN and requires publishing the ports in the container settings as well, which are located in the compose.yml file.
The other thing to consider is that shortnames cannot be used for machine sharing to others; meaning that others will never be able to access those site names. If you want to share a machine and service, use the FQDN of proxy.DOMAIN-ALIAS.ts.net or whatever the machine is named.
Those should be all the limitations with DNS resolution that can trip up anyone trying to self-host their services on their tailnet and LAN.
Problems I ran into while testing
My learning experience
One of the major issues I had with running this container on TrueNAS SCALE happened because I gave the container a dedicated network interface. The container then had two IP addresses and multiple networks to route through.
The two networks were the docker internal network and the LAN on the server. It turns out that docker service prefers to setting the internal docker network to be the default route going out to the Internet, but I wanted to resolve my web server requests with the LAN IP address I provided the container. When I created the container, I set it to use the tailscale0 TUN kernel device instead of using the userspace-networking mode. It happily spun up the container and seemed to work. The problem was that I could not establish a direct connection with devices off my LAN. Well, it turns out that because the docker network was the default route, tailscale was getting confused which endpoint it should be using and tailscale netcheck in the container would come back with
* MappingVariesByDestIP: true
and it would always use a DERP relay. Not what you want to stream any sort of data.
To solve my issue, I added some extra commands to remove the default route and add a new one, if the correct environmental variables were passed to the container.
OVERRIDE_DEFAULT_ROUTE=true
GATEWAY_IP=10.0.0.1
LAN_NIC=net1
TRUENAS_SYSTEM=true
TRUENAS_SERVICE_NETWORK=172.17.0.0/16
TRUENAS_CLUSTER_GATEWAY_IP=172.16.0.1
entrypoint.sh runs this bit of shell-script before running tailscaled:
if [ $OVERRIDE_DEFAULT_ROUTE = "true" ]; then
  ip route delete default
  ip route add default via $GATEWAY_IP dev $LAN_NIC
  if [ $TRUENAS_SYSTEM = "true" ]; then
    ip route add $TRUENAS_SERVICE_NETWORK via $TRUENAS_CLUSTER_GATEWAY_IP dev eth0
  fi
fi
With that, my TrueNAS container can now use the correct default gateway, which in turn allows for
* PortMapping: UPnP, NAT-PMP, PCP
I setup UPnP on my OPNsense router, applied Static mapping and it randomizes the client port used for tailscale; this allows all my devices to get direct connections form other Internet devices accessing my tailnet.
This is the end
of this part
That should hopefully bring you up to speed on how to start using caddy on a tailnet with a docker container. In the next part, I will be going over how to start a Nextcloud container and get caddy to reverse proxy to it; allowing you access to all your important data from the LAN or tailnet with the bonus of TLS.
Thanks for reading!